For $5, Turn Your Drab Light Switches and Outlets Into Art
Bring back this favorite childhood craft.
Updated Oct 12, 2018 9:57 AM
We may earn revenue from the products available on this page and participate in affiliate programs.
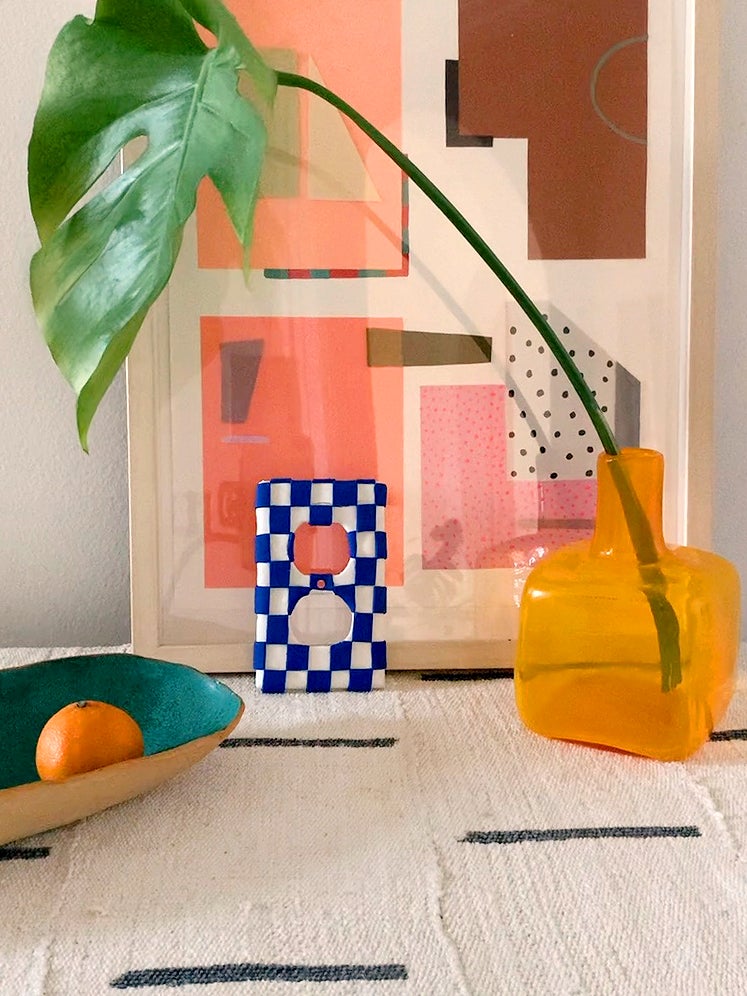
When Brooklyn-based artist Caroline Kaufman was just 9 years old, people would line up at craft fairs to buy her work. But back then, she wasn’t making the vibrant textiles she’s known for now. She was selling light switches, clad in colorful polymer clay, for $5 each. “It was one of my first creative obsessions,” she recalls. Transforming the fixtures was how she and her two sisters passed the time growing up in West Virginia (it also helped that their mom is an artist). Fast-forward 20 years to the peak of quarantine: Kaufman picked up the same bag of Sculpey she’s had since she was a kid and turned all the drab white outlet covers and light switch plates in her Park Slope apartment into art. “It’s a small, contained surface that adds so much detail to a room,” she says.
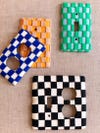
Kaufman has been doing everything in her house in checkerboard lately—and these plastic pieces are no exception. The modern designs are a far cry from the floral and polka dot creations of her childhood, but the process is just as simple. There are no fancy tools involved, she insists, just some clay, a light switch plate (or outlet cover), and a few common kitchen tools.
The Supplies
- Two colors of Sculpey (you can buy individual packs for around $2 each)
- Outlet cover or light switch plate
- Knife
- Drinking glass or other rolling device
- Oven
- Paint
Step 1: Determine Your Base
Choose the color you want to use to cover the entire fixture. Roll a small chunk of the clay in your hands to soften it up, then, using a water glass with a rounded edge, roll it out into a fairly thin sheet that’s slightly larger than the perimeter of the light switch plate or outlet cover (Kaufman has also used a pasta machine for this part). Drape the clay over the plastic. Trim off any excess material along the edge with a knife and punch out any parts where there is an opening for a plug or a screw using your finger.
Step 2: Apply Your Design
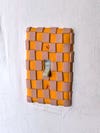
Roll out a thin sheet of your second color the same way you did the base. Kaufman played with tonal hues (peach on orange, green on turquoise) when making most of her grids. Using a sharp kitchen knife, cut out little squares (you don’t need a ruler or a mold for this step, just use one square as a template for the next). “They won’t be perfectly precise, but because it’s a pretty graphic pattern, your eye won’t notice the inconsistencies when it’s all done,” says Kaufman. Press the shapes into the clay-wrapped plastic so there are no air bubbles.
Step 3: Put It in the Oven
Now it’s time to make your design permanent. Put your revamped outlet cover or light switch plate in the oven at a low temperature (around 200 degrees Fahrenheit). Bake it for 20 minutes or until the clay has slightly fused with the plastic. (Kaufman notes this works with metal pieces, too.) “I’m sure if it dropped off the wall, it might crack, but overall it feels pretty sturdy,” she says.
Step 4: Paint Over Any Screws
Attach the cover back onto the wall once it has cooled down and complete the look by making the screws the same color as the clay. Kaufman used an oil-based wash for hers, but the artist notes you could use any type of paint you have lying around.
“I have rented for 10 years, and I’ve never really done anything major in an apartment,” says Kaufman. “I’ve always found ways to make my space my own without ripping out the walls.”
Our Fall Style issue has arrived! Subscribe now to get an exclusive first look at Ayesha Curry’s Bay Area home—and discover how design can shape our world.